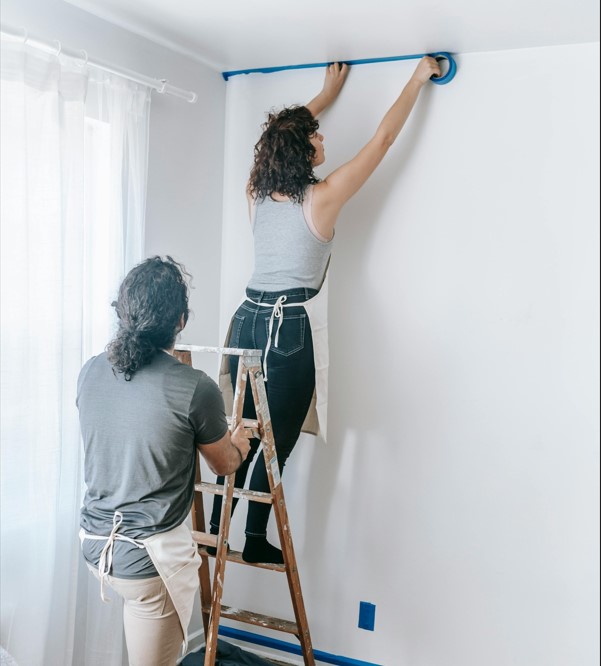
When it comes to painting walls, preparation is everything—and proper taping is one of the most overlooked (yet crucial) steps. Whether you’re painting an accent wall, refreshing a room, or tackling a full renovation, learning how to tape a wall for painting can make the difference between a polished, pro-level finish and a sloppy DIY mess.
As an expert in residential paint preparation and interior upgrades, I’ll walk you through everything you need to know to tape like a pro—no paint bleed, no frustration.
Why Taping Matters
Taping isn’t just about keeping paint off the trim—it ensures:
- Crisp, clean edges
- Faster cleanup
- No accidental splashes on baseboards, ceilings, or outlets
Done right, it gives your space that sharp, professional finish you’d expect from a high-end painter.
What You’ll Need
Before you get started, gather the following supplies:
- Painter’s tape (blue or green varieties work best)
- Putty knife or taping tool
- Step ladder
- Clean, dry cloth
- Drop cloths (for floors and furniture)
- Optional: Measuring tape and level for precision
⚠️ Avoid masking tape. It can leave residue and peel off paint when removed.
Step-by-Step: How to Tape a Wall for Painting
1. Clean the Surfaces
Start with a dry, dust-free surface. Wipe down walls, baseboards, and trim to help tape stick properly. If the area is greasy or grimy (especially in kitchens), use a mild detergent.
2. Choose the Right Tape
Use narrower painter’s tape (0.94″ or 1″) for trim or delicate surfaces, and wider tape (1.5″ or more) for baseboards and large protection zones.
- Blue tape: Standard, all-purpose
- Green tape: Stronger adhesion, good for textured surfaces
3. Apply in Sections
Unroll the tape slowly and press it along the edge where the wall meets trim, ceiling, or baseboard. Overlap slightly when starting a new strip to avoid gaps.
4. Seal the Tape
Use a putty knife or plastic taping tool to press down the edge of the tape. This prevents paint from bleeding underneath and gives you that ultra-crisp line.
🎯 Pro Tip: Run your fingernail or a straight edge along the tape one last time before painting. This seals any air pockets.
5. Mask Light Switches and Outlets
Cut small strips of tape to cover electrical outlets, switch plates, or fixtures—unless you’ve already removed them.
6. Paint With Confidence
Now your surface is fully prepped. Paint along the taped edge with care. You can “cut in” with a brush along the tape line, or roll over it if the tape is well sealed.
7. Remove Tape at the Right Time
Timing is critical. Remove the tape when:
- The paint is still slightly tacky (usually within 30–60 minutes), OR
- After the paint is fully dry, using a razor to score the edge before peeling.
Peel back slowly at a 45-degree angle to avoid pulling up any fresh paint.
Common Taping Mistakes to Avoid
🚫 Skipping surface prep: Dirty or oily walls = peeling tape and fuzzy lines.
🚫 Leaving tape on too long: Can cause it to bond too tightly and tear off paint.
🚫 Using the wrong tape: Cheap masking tape isn’t built for painting.
🚫 Not sealing the edges: This is the #1 cause of paint bleed.
Bonus: Where to Tape (and Where Not To)
Tape these areas:
- Baseboards
- Trim and crown molding
- Window and door frames
- Ceiling edge (if wall color changes at ceiling)
- Adjacent walls (for accent walls)
Don’t tape:
- Already painted areas where tape may peel finish
- Highly textured surfaces (use a brush instead for better control)
Final Thoughts: Tape Once, Paint Like a Pro
Taping may take a little extra time, but it pays off in effortless cleanup and beautiful results. Whether you’re repainting a room or experimenting with bold wall colors, knowing how to tape a wall for painting is one of the easiest ways to elevate your DIY game.
With the right tape, the proper technique, and a bit of patience, you’ll get those crisp, magazine-worthy lines—no painter required.
Want More DIY Home Painting Tips?
Browse our Home Painting & Prep category for expert how-tos, product reviews, and room-by-room painting guides.